Send and receive email using Microsoft 365
This guide describes how Microsoft 365 can be configured to allow for usage of Exchange to manage email to and from Kundo Mail using Active Directory and Microsoft Graph API. All emails will by default be kept in M365 (both delivered incoming email and mail sent from Kundo). If you wish to have delivered and/or sent email removed from M365 inform us via support@kundo.se so we can adjust the settings accordingly.
Prerequisites
This guide is only applicable for cloud-based inboxes, this as Microsoft are yet to support on-premise services in their Graph API.
Step-by-step instructions
1. Add an app registration
- Go to the Active Directory page in your Azure portal.
- Go to App Registrations > New Registration.
- Fill in Name: Kundo Mail and then click on Register.
You don't need to fill in any Redirect URL. - You will now come to an overview page for the app registration.
Copy the Application (client) ID and Directory (tenant) ID values.
- Go to Certificates & Secrets > New client secret.
- Add a "client secret", have it expire after 24 months and copy the value for later. Please notify our support at support@kundo.se if you choose a shorter expiration time. Copy the client secret for use later in the guide.
- These values will be used setting up the integration in Kundo under Inbox Settings > Send & Receive.
- If you don't see this form at the bottom of the page then please contact your success manager.
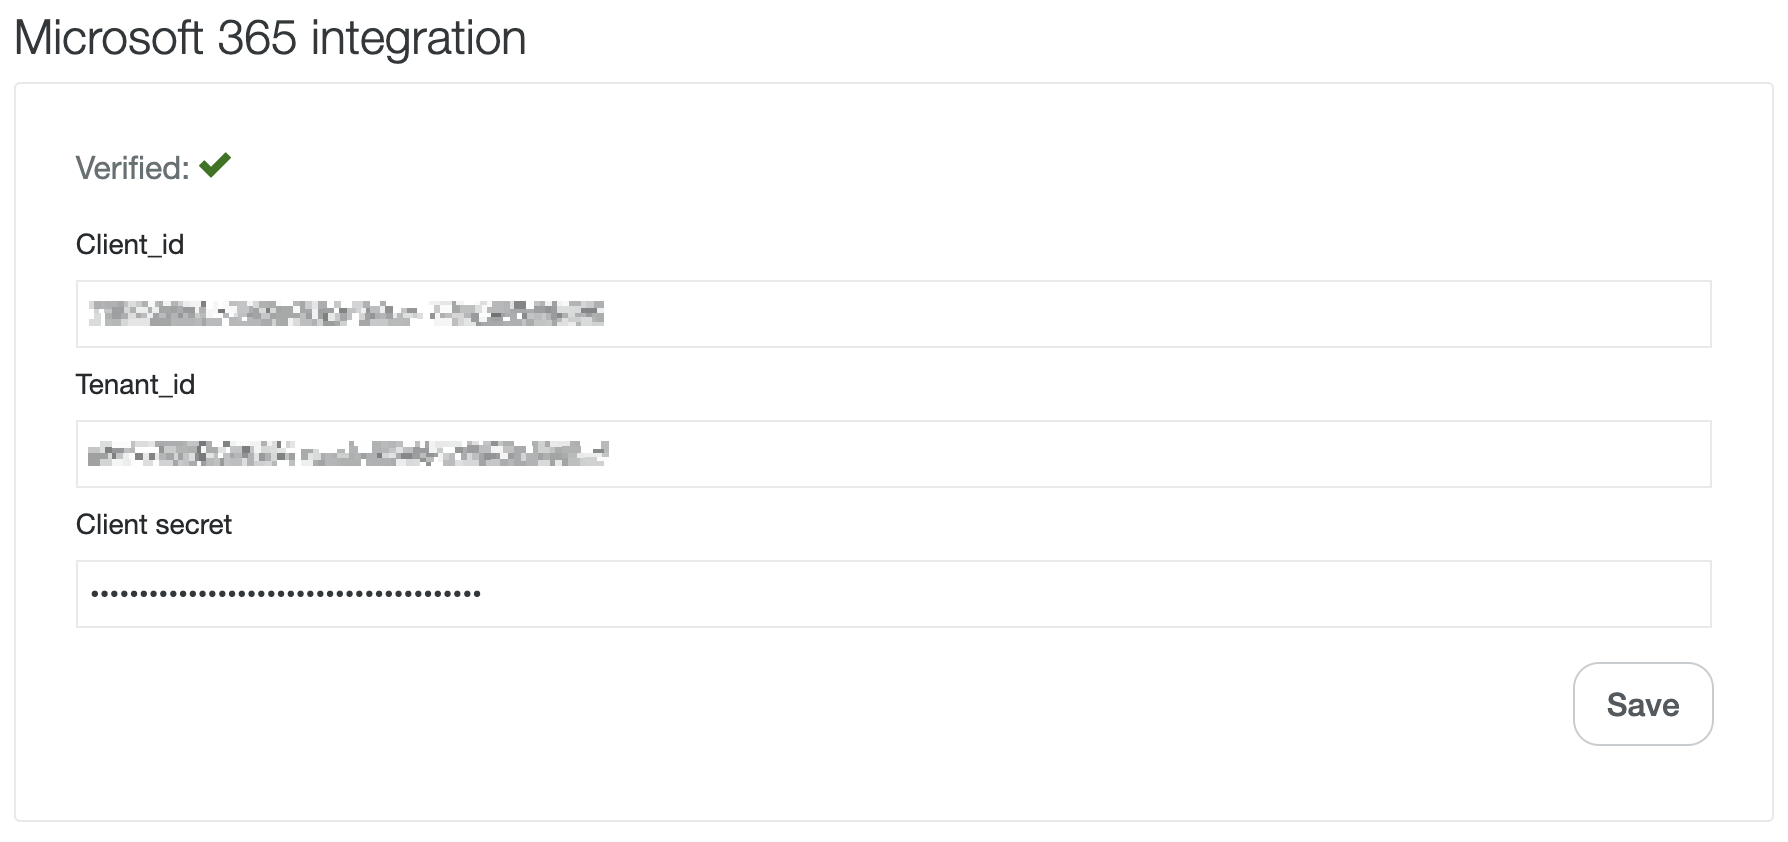
- Fill in the form and click "Save". At this point, a red cross may appear instead of a green checkbox - this is ok and will be resolved through upcoming instructions in the guide.
2. Add permissions
- Go to API permissions
- Click Add a permissions
- Click on Microsoft Graph > Application permissions and search for "mail".
- Check both Mail.Send and Mail.ReadWrite
- Click Add permissions.
The Mail.ReadWrite claim is required due to a limitation when sending email larger than 3MB. In this case a draft has to be created before the attachments can be uploaded and the email sent.
The permissions need to be granted, click Grant admin consent for <Organization>.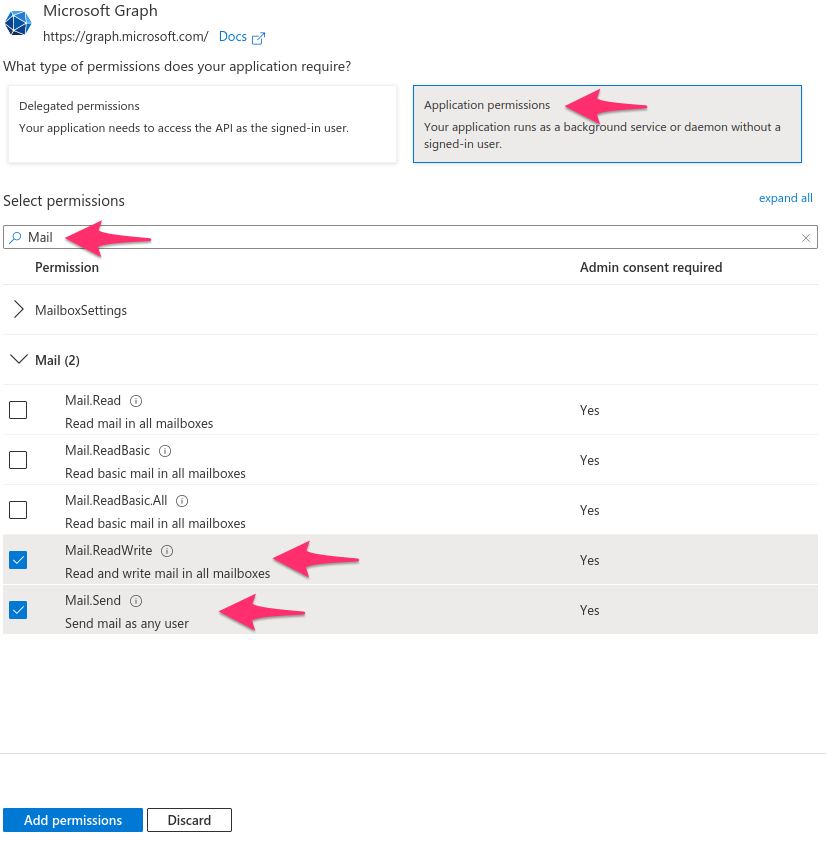
3. Add an logo to the app registration (optional)
Go to Branding and add a Kundo logo and title to the App registration, to make it easier to keep track of.
You are welcome to use this logo:![]()
4. Add mail-enabled security group
To only allow access to the accounts you're connecting with Kundo you need to set up a security group with these accounts, following are the required settings to add this group and more information can be found here.
In the Exchange Admin Center, navigate to Recipients > Groups > Mail-enabled security.
Click Add a group and follow the instructions in the details pane.
Under Choose a group type section, select Mail-enabled security and click Next.
Under Set up the basics section, enter your details and click Next.
- In Assign owners section, click + Assign owners, select a group owner from the list, and click Next.
Under Add members, click + Add members, select the group members from the list, remember to only select the accounts that you're adding to kundo and click Next.
5. Add application access policy
The application access policy can only be added via Exchange Online Powershell. The following instructions describe the process to add a policy restricting an applications access to the users in the security group. More information can be found here.
Connect to Exchange Online PowerShell. For details, see Connect to Exchange Online PowerShell.
- Create an application access policy.
- Run the following command, replacing the arguments for AppId, PolicyScopeGroupId, and Description.
- New-ApplicationAccessPolicy -AppId <app-id> -PolicyScopeGroupId <security-group-name or email> -AccessRight RestrictAccess -Description <Description for the policy, e.g. `Restrict Kundo Mail app to intended emails`>
- Test the newly created application access policy.
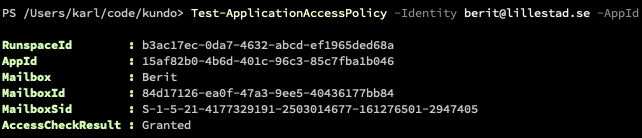
- Run the following command, replacing the arguments for Identity and AppId.
- Test-ApplicationAccessPolicy -Identity <email> -AppId <app-id>
- Testing with an email in the security group should result in access granted and one not in the group should result in access denied.
- Note: It can take some time for these settings to take effect in other parts of the system.
6. Activate integration
Finally go back to the settings page and verify the verification checkmark is green, if not then it can be one of the following reasons.
- The policy hasn't replicated to all related services yet.
- One of the values entered in the settings is wrong. It is for example easy to confuse client secret ID with client secret value
- The integration is being applied to an inbox with an e-mail address not part of the security group created.
If the checkmark is green, contact Kundo support to activate the integration.
If you have any questions about the process or encounter any problems, please feel free contacting our support@kundo.se.