4. Create categories, icons and put them in order
The categories in the Help center helps your visitors to get a better overview and simplifies navigation. The categories also help your users to sort your guides out.
Help center starts off with no categories and it is up to you to decide what type of categories are required to fit your business. Before moving on top the next step you need to decide how you want to categorize the guides that will be in the Help center.
We recommend a maximum of 9 categories
Creating categories

1. Click on the three lines in the blue menu
2. Select Guides for the correct Help center
3. Click on Categories
4. Click on Create new category
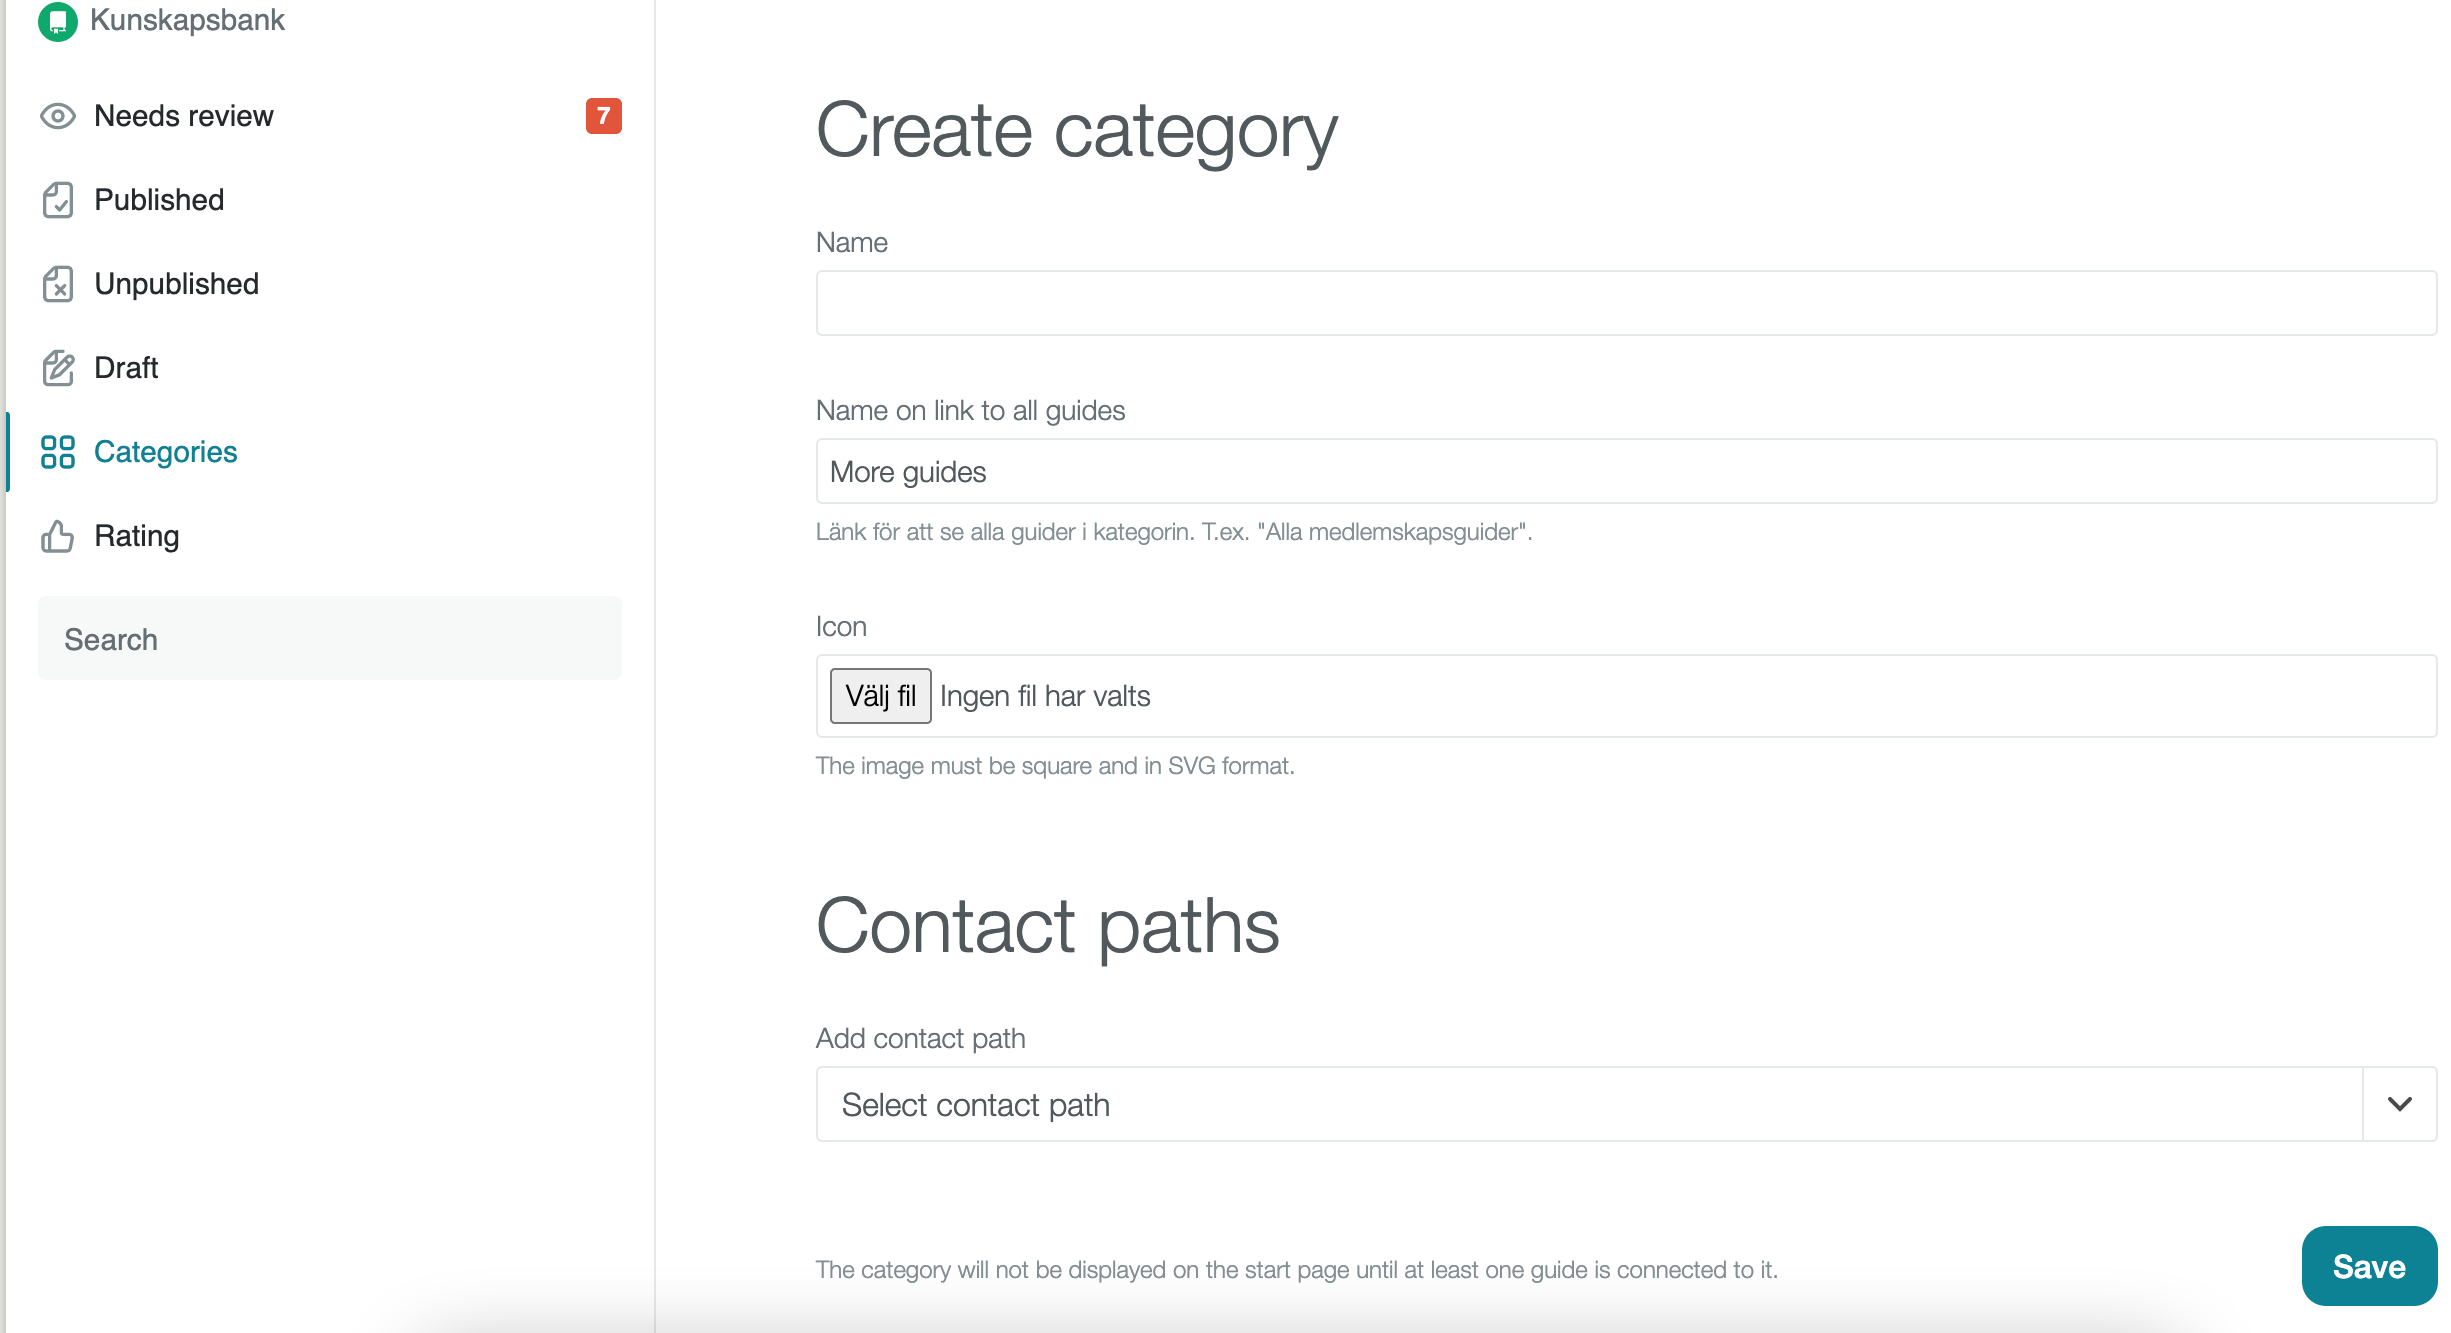
Name: Here you write the "title" of the category. This can be seen on Help center's start page.
Name of link to all guides: Here you enter the name of the link under the guides in a category that takes the visitor to a page that shows all guides. It is common to name it as "See all guides".
Icon: The icon is the small image next to the category name on Help center's homepage. You will have to choose icons yourself, it is important that these are in SVG format. If you do not have your own icons to use, you can talk to your customer success manager who will help you produce icons that fit the categories.
Contact path: Here you can add an alternative contact route that helps the visitor to contact you if, for example, the guide that the visitor has just read has not been of any help to that particular visitor. These end up at the bottom of the page, below the guide.